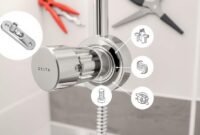
The shower faucet is prone to leaking, yet some great products are well-designed to be stronger than others. But still, nothing is perfect when it gets older and undergoes proper maintenance. So, even a renowned decent product such as Delta shower faucet can break down, making that drip-drip from the faucet.
If that circumstance occurs, this is how to fix a leaky Delta shower faucet.
How to Fix a Leaky Delta Shower Faucet Easily
When it comes to fixing bathroom equipment, you may think it is so difficult that it may drive you crazy. Well, you said so, but never try it for once. What if it is caused by common causes that you can search for its fixing tricks?
Speaking of a dripping faucet, you may think it’s the shower head that goes wrong after seeing Delta shower head leaks when water is turned on. But the truth is, the fault is on the faucet to blame. Hence it would help if you fixed the faucet, not the shower head.

Listed below are some general problems that may result in a leaky faucet:
- Loosened nuts. If the dripping water comes from around the nut area or from the handle’s base, then the nuts problem can become why it drips.
- Or, it’s the washer which is:
- worn out,
- not attached nicely,
- not matching the size, or
- poor in quality.
When the leaky faucet occurs, you can count on this procedure of how to fix a leaky shower faucet Delta.
- First, turn off the main water valve so that the water current is cut off.
- Turn on the faucet to remove the water pressure and to let the remaining water flow.
- Find any screw connecting to the faucet. Then, using a Phillips screwdriver or Allen wrench, detach the screw. Remove the remaining attachment then.
- Using needle-nose pliers, get the pin that holds the cartridge. Grip the valve system using pliers and draw out the cartridge.
- Please take a closer look at the cartridge to see whether it has mineral deposits or not. If it is the case, soak it (the cartridge) in a white vinegar solution overnight or simply until the mineral deposit disappears.
- If you find cracks or pits upon your inspection, then it’s time to replace the cartridge (dismiss the old one).
- Next, get a utility knife. This is used to cut the O-rings from the cartridge. Please get a new one, then apply the plumber’s grease to slide it back seamlessly easy.
- Now get a flat-head screwdriver. Inside the valve housing, you will see rubber gaskets attached to the valve seats. Remove the rubber gaskets, and attach the new ones.
- Once you’re there, it’s time to push the newly fixed cartridge back in. Put back the screw and pin to secure the collar.
- Reset the temperature limiter into its original place, then put back the cap and the handle.
- Now it should do the trick. Try turning on the water current to check whether you can be a novice repairman or not.
Well, that is how to fix a leaky Delta shower faucet. It seems too long at first, but you can overcome it at the end if you follow it bit by bit.


