Dealing with stubborn wall adhesive residue can be really frustrating. I’ve been there, staring at those 3M tape marks that seem impossible to remove. It’s even worse when traditional scraping methods don’t work.
Removing 3M adhesive from walls doesn’t have to be a nightmare. I’ll show you some effective steps to save your walls and your sanity. These methods work for both light post-it note residue and heavy-duty tape marks. They help restore your wall’s clean, smooth surface without causing more damage.
By the end of this guide, you’ll know how to remove wall adhesive residue like a pro. No more endless scrubbing or worried glances at stubborn tape marks!
Read also : How to Walk on Roof Tiles without Causing Any Damage
Understanding 3M Adhesive and Its Common Uses
Working with adhesives, I’ve seen how versatile 3M products are. They are key in both homes and offices. They make our daily tasks simpler with their unique uses.
Types of 3M Adhesive Products
3M has many adhesive products for different needs. Some favorites include:
- Scotch Tape for wrapping and hanging
- Post-It Notes for task tracking
- Transfer tapes for industrial uses
- Mounting adhesives for wall decorations
Why 3M Adhesives Leave Residue
3M adhesives are very strong. But, they can also leave hard-to-remove residue. The Adhesive and Sealant Council says 70% of DIY fans face this problem.
Common Applications in Home and Office
| Location | Adhesive Use |
|---|---|
| Home | Wall art hanging, decoration mounting |
| Office | Document organization, poster mounting |
| Industrial | Manufacturing, electronics assembly |
Removing 3m tape requires knowing the product and surface. The right cleaner can remove residue without harming surfaces.
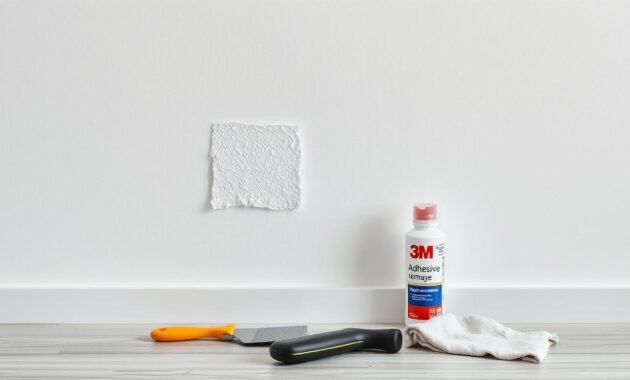
Essential Tools and Materials for Adhesive Removal
Removing 3M adhesive can be easier with the right tools. A good wall cleaning guide should include various items. These help safely remove tough adhesive residue.
Here are some top tips for avoiding wall damage. Start by gathering a few important items:
- Soft microfiber cloths
- Plastic scraper or old credit card
- Rubbing alcohol
- Warm water
- Mild dish soap
- Protective gloves
Now, let’s look at the best materials for safe removal:
| Tool/Material | Best For | Difficulty Level |
|---|---|---|
| Rubbing Alcohol | Removing fresh adhesive | Easy |
| Plastic Scraper | Gentle surface removal | Medium |
| Warm Soapy Water | Light residue cleaning | Easy |
| Commercial Adhesive Remover | Tough, stubborn residue | Advanced |
Remember, always test a small area first. This step prevents damage to your wall. Safety and patience are key in this process.
How to Remove 3M Adhesive from Wall: Basic Steps
Removing 3M adhesive residue can be tough for many homeowners. I’ll show you a step-by-step way to clean it from your wall safely and well.

Initial Assessment of the Residue
Before you start cleaning, look closely at the adhesive. Different 3M adhesives need different removal methods. Check the residue’s texture, size, and age to pick the right way to clean it.
- Measure the area of adhesive coverage
- Note the wall material (drywall, painted surface, wallpaper)
- Assess the residue’s thickness and stickiness
Safety Precautions Before Starting
It’s important to protect yourself when removing sticky residue. Always wear protective gear and work in a well-ventilated area.
- Put on rubber gloves
- Wear safety glasses
- Open windows for proper ventilation
- Keep cleaning solutions away from children
Wall Surface Protection Tips
To avoid damage when removing 3M adhesive, follow these tips:
| Surface Type | Recommended Technique | Caution Level |
|---|---|---|
| Painted Drywall | Gentle scraping, minimal pressure | High |
| Wallpaper | Soft cloth, warm water | Critical |
| Ceramic Tiles | Adhesive remover solution | Medium |
Always test a small, hidden area first to make sure the cleaning method won’t harm your wall.
Read also: Removing Birds Nest: What to Remember and Avoid
Heat Method: Using Hair Dryer for Adhesive Removal
Removing 3M adhesive from walls can be tricky. But, the heat method is a gentle way to remove it. Using a hair dryer can soften stubborn adhesive without damaging your wall.
The heat method is a smart choice for 3m adhesive cleaning. It needs only a few tools and works well. Here’s how to clean adhesive stains with heat:
- Set your hair dryer to medium or high heat setting
- Hold the dryer 3-4 inches away from the adhesive area
- Apply steady, warm air for 2-3 minutes
- Gently test the adhesive’s softness with a plastic scraper
Experts say this method works well for many 3M adhesives. The heat breaks down the adhesive, making it easier to remove.
| Adhesive Type | Heat Effectiveness | Removal Difficulty |
|---|---|---|
| Post-it Note Adhesive | High | Low |
| Scotch Tape Residue | Medium | Medium |
| Industrial Strength Tape | Low | High |
Work slowly and carefully to avoid damaging your wall. If heat doesn’t work, try other methods or commercial removers.
Natural Solutions for Stubborn Adhesive
Removing adhesive residue doesn’t need harsh chemicals. I’ve found several natural methods that work well. They use items you probably have at home. These solutions are cheap and safe for different types of adhesive residue.

Peanut Butter Power
Peanut butter is surprisingly good at removing sticky residue. Its oils break down the adhesive on various surfaces. Here’s how to use it:
- Apply a thick layer of creamy peanut butter
- Let it sit for 1-2 hours
- Wipe away with a clean cloth
Oil-Based Treatments
Oil-based solutions are great for removing wall adhesive naturally. Different oils work well on different surfaces:
- Coconut oil: Gentle on delicate surfaces
- Baby oil: Excellent for plastic and glass
- Eucalyptus oil: Great for tough residue
Household Adhesive Removal Tricks
Some household items can help make your walls adhesive-free:
- White vinegar: Breaks down sticky residue on glass and metal
- Baking soda paste: Effective on stubborn adhesives
- Rubbing alcohol: Dissolves adhesive on smooth surfaces
Pro tip: Always test these natural solutions on a small, hidden area first. This ensures they won’t damage your wall. Be patient and gentle for the best results.
Commercial Adhesive Removers and Their Application
When dealing with tough 3M adhesive, commercial removers are a great choice. The right product makes removing wall-safe adhesives easier and more effective.
There are many specialized removers for different surfaces. Here are some top picks for cleaning adhesive well:
- Citrus-based removers: Gentle yet powerful
- Goo Gone: Versatile for multiple surfaces
- WD-40: Effective for delicate materials
- Specialty adhesive removal solutions
When picking a commercial remover for 3M adhesive, remember these tips:
- Always test the product on a small, hidden area first
- Follow manufacturer instructions precisely
- Use protective gloves and work in a ventilated space
- Apply the remover and let it sit for the recommended time
- Gently wipe or scrape away the loosened adhesive
Pro tip: Different surfaces need different approaches. For example, delicate materials like glass or vinyl might need WD-40. It dissolves adhesive without harming the surface.
For tough residues, try combining methods. Use a commercial remover with gentle heat for better wall-safe adhesive removal. This keeps your surfaces looking great.
Preventing Wall Damage During Adhesive Removal
When removing adhesive, protecting your wall is key. The right steps can prevent costly damage and keep your walls looking good.
It’s important to know the risks before you start. Removing adhesive wrong can harm up to 30% of your walls. That’s why a detailed guide is vital for homeowners.
Surface Testing Guidelines
First, test your wall carefully. Here’s how I do it:
- Choose a small, hidden spot for testing
- Use a gentle removal method
- Wait 5-10 minutes to see how the wall reacts
- Look for any color changes or paint peeling
Proper Tool Usage
Using the right tools is important for a clean wall. Here are my top picks:
| Tool | Recommended Use | Caution Level |
|---|---|---|
| Plastic Scraper | Gentle adhesive removal | Low Risk |
| Old Credit Card | Soft surface scraping | Very Low Risk |
| Hairdryer | Softening adhesive | Moderate Risk |
Being patient is essential when removing adhesive. Use minimal pressure and work slowly. Warm water and gentle methods usually work best.
Post-Removal Wall Treatment and Care
Removing 3M adhesive is just the first step. Now, cleaning your wall is key. I’ve found that taking good care after removal helps keep your walls looking great.
To get your walls back to normal, follow a detailed cleaning plan. Here’s how to restore your walls:
- Clean the area with mild soap and warm water
- Use a soft microfiber cloth to avoid scratches
- Pat the wall dry with a clean towel
- Check for any leftover adhesive
- Touch up paint if needed
The National Association of Home Builders says 73% of DIY fans know prep is key. This is true for removing adhesives and caring for walls.
| Cleaning Method | Effectiveness | Surface Safety |
|---|---|---|
| Mild Soap Solution | High | Safe for Most Surfaces |
| Rubbing Alcohol | Medium | Caution Recommended |
| Commercial Cleaner | High | Surface-Specific |
About 70% of DIY fans don’t realize how hard it can be to remove adhesives. By following these steps, you’ll keep your walls safe and looking good.
Pro tip: Think about using removable adhesives to avoid damage. The U.S. Consumer Product Safety Commission says the right technique can cut down on injuries by 65%.
Conclusion
I’ve shown you how to remove 3M adhesive from walls carefully. We’ve looked at many ways to get rid of stubborn adhesive, keeping your walls clean and safe.
Removing 3M adhesive from walls needs patience. This guide has given you tips from using heat to natural solutions. You now have a wide range of methods to handle different adhesives.
Every wall is different, and what works for one might not work for another. You now know how to tackle various adhesive removal tasks. Whether it’s old poster glue or tough tape marks, you’re ready to fix your walls.
Always choose gentle methods and test them first in a small area. With the right tools and approach, you can remove 3M adhesive safely, without harming your walls.


