Water leaks can quietly harm your home’s structure, leading to thousands in damage. Many overlook a key weakness: roof pipe vents not sealed right. A damaged roof pipe vent can turn a small issue into a big water problem, risking your home’s foundation and inside.
I’ll show you how to understand pipe jacks roofing and keep your home safe. This guide is for DIY fans or those looking for expert advice. It will teach you about roof pipe jacks and help keep your home dry and safe.

Understanding Roof Vent Jacks and Their Purpose
Roof vent jacks are key in keeping your home dry. They seal the roof around pipes. Knowing how they work helps keep your roof safe from leaks.
Roof jacks do a lot for your home. They keep water out by sealing around plumbing vents. Made from steel or lead, they guard your roof from water harm.
Read also: How to Install Drip Edge on Shed Roof
Key Components of a Roof Jack System
A roof jack system has a few important parts:
- Flashing material for water resistance
- Protective boot or cover
- Sealant to prevent water penetration
- Secure mounting hardware
Benefits of Proper Vent Jack Installation
Getting a roof jack installed right has many benefits:
- Prevents water infiltration
- Reduces risk of structural damage
- Improves overall roof performance
- Extends the lifespan of your roofing system
Common Types of Roof Jacks Available
There are many roof jack types to choose from:
- Galvanized steel pipe jacks
- Lead pipe jacks
- Rubber boot-style jacks
- Adjustable flashing jacks
Choose a roof jack based on your roof’s needs and your area’s weather. A pro install will make your roof last longer.
Signs Your Roof Jack Needs Replacement
Knowing when to replace a roof jack can save you from expensive water damage and structural issues. Roof jacks are key to your home’s ventilation system. Catching problems early is vital to keep your roof in good shape.
When checking your roof jack, look for these warning signs that mean it’s time for a new one:
- Visible cracks or splits in the pipe jack material
- Loose or shifting fittings around the vent pipe
- Significant rust or corrosion on metal components
- Water stains or moisture around the vent pipe area
- Deteriorating caulk or sealant
When choosing between pipe jack and split boot, know their differences. Pipe jacks are best for standard vertical pipes. Split boots are better for odd angles or tricky roof shapes.
Replacing a roof jack is more than just stopping leaks. It’s about keeping your home safe and ensuring good air flow. Roofers say to check your roof at least once a year, more after bad weather.
Watch out for animal damage to your roof jack. Rodents and birds can wear it down without you seeing it from the ground.
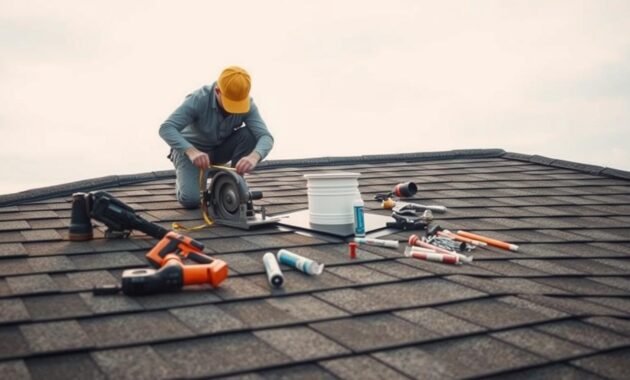
Essential Tools and Materials for Pipe Jacks Roofing
Getting ready for a roofing pipe jack installation needs careful planning and the right tools. I’ll show you the key tools and materials for a successful pipe jack roofing system project.
Before you look for roofing pipe jacks for sale, it’s key to know the tools and safety gear needed for a pro installation.
Required Safety Equipment
- Fall protection harness
- Non-slip work boots with good traction
- Safety glasses
- Work gloves
- Hard hat
- Knee pads
Necessary Installation Tools
- Pry bar
- Caulking gun
- Hammer
- Roofing nails
- Utility knife
- Tape measure
- Level
Recommended Materials List
| Material | Purpose | Recommended Quantity |
|---|---|---|
| Pipe jack roofing system | Primary installation component | As needed per project |
| Roofing sealant | Weatherproofing | 1-2 tubes |
| Flashing | Water barrier | Matches pipe jack size |
| Roofing cement | Additional sealing | 1 container |
Quality tools and materials are key for a successful pipe jack roofing system installation. Always buy from trusted suppliers and check if they fit your roofing needs.
Preparing Your Roof for Jack Installation

When you’re getting ready to put in pipe jack roof supports, safety and accuracy are key. I’ll show you how to prepare your roof for a successful jack installation. The right preparation stops damage and makes the job easier.
Before you start, make sure you have these important tools for using roof jacks for shingling:
- Flat pry bar
- Roofing hammer
- Safety harness
- Protective gloves
- Ladder with stabilizers
First, check the roof area around the vent pipe carefully. Look for wear, damaged shingles, or weak spots. Clean the area well, removing debris and checking the roof’s structure.
When taking off old shingles, use your flat pry bar gently. Loosen the shingles slowly to avoid damage. Be careful with the nails above the jack spot to keep the roof waterproof.
Pro tip: Always work carefully and keep three points of contact on the roof. Wear non-slip shoes and use a safety harness to avoid falls during installation.
- Check roof slope and stability
- Clear work area completely
- Ensure proper lighting
- Have all tools within reach
By following these steps, you’ll set up a safe and solid base for installing your roof jack system.
Step-by-Step Removal of Old Roof Jack
Removing an old roof jack needs care to avoid damaging your roof. I’ll show you how to safely take out the old jack. Then, you can install a new one using adjustable roofing jacks.
- Hook blade utility knife
- Pry bar
- Roofing hammer
- Safety glasses
- Work gloves
Preparing for Jack Removal
Clear the area around the vent pipe first. Remove any debris or loose stuff that could get in the way. Make sure you have a firm footing on the roof and wear the right safety gear.
Detailed Removal Technique
To remove the old roof jack, follow these steps:
- Use a hook blade knife to cut through caulk or tar at the jack’s seam
- Start prying up the jack, taking out the nails around it
- Slide the old jack off the vent pipe
- Check the roof surface below for any damage
| Tool | Purpose | Safety Consideration |
|---|---|---|
| Hook Blade Knife | Cut sealant | Wear protective gloves |
| Pry Bar | Remove jack | Maintain balanced stance |
| Roofing Hammer | Remove nails | Use controlled movements |
When using adjustable roofing jacks, always put safety first. Take your time. Rushing can cause roof damage or hurt you.
Installing the New Pipe Jack System
Installing a new pipe jack system needs precision and attention to detail. I’ll guide you through the essential steps for a secure and effective installation. This will protect your roof’s integrity.
Start by gathering your pipe jack shoring materials and inspect the vent pipe area. Measuring accurately is vital for a successful installation. Focus on the following steps:
- Measure the vent pipe diameter precisely
- Select the appropriate pipe jack size
- Prepare your cutting tools
- Clean the surrounding roof surface
The top part of your new pipe jack has cutting lines for a perfect fit. Use a sharp utility knife to cut at the designated lines. This should match your vent pipe’s size. Slide the new jack over the vent, ensuring a snug fit.
Using pipe jack shoring techniques is key to keeping your roof’s structure strong. Align the jack carefully, making sure it’s flush against the roof. Use roofing nails to secure the jack, creating a watertight seal to prevent leaks.
- Use roofing sealant around the jack’s edges
- Nail the jack at recommended intervals
- Check for any gaps or possible entry points
- Verify the jack’s stability
Remember, proper pipe jack formwork is more than just fitting equipment. It’s about creating a strong barrier against water damage. This ensures your roof performs well for years to come.
Proper Sealing and Weatherproofing Techniques
When you install a pipe jack, making a watertight seal is key to keep your roof dry. The pipe jack bracing system needs careful weatherproofing to protect your home well.
I’ll show you how to seal and protect your roof’s pipe jack installation right. Sealing it well stops water leaks and makes your roof last longer.
Applying Roofing Sealants
Choosing the right sealants is vital for a pipe jack temporary works installation. Here are the important steps:
- Use high-quality silicone caulk for maximum protection
- Apply sealant along all shingle edges around the pipe jack
- Carefully cover exposed nail heads on the jack’s flange
- Spread sealant evenly to create a smooth, consistent barrier
Weather Protection Methods
Keeping your pipe jack safe from the weather needs a smart plan. Here’s a detailed guide to weather-resistant methods:
| Weather Condition | Protection Strategy |
|---|---|
| Heavy Rain | Extra silicone sealant around pipe jack edges |
| Extreme Heat | Use UV-resistant sealants and flashing |
| Freezing Temperatures | Apply flexible, cold-resistant sealant materials |
By using these sealing and weatherproofing methods, your pipe jack bracing system will stay secure and leak-free for a long time. Remember, a little extra care in application can prevent expensive water damage repairs.
Shingle Replacement Around the Jack
After setting up a new pipe jack roofing system, it’s key to replace shingles carefully. This ensures your roof stays strong. I’ll show you how to replace shingles around the pipe jack for a tight seal and a pro finish.
Replacing shingles right involves a few important steps. The main thing is to make sure the pipe jack fits well with the rest of the roof. Here’s what to do:
- Carefully return removed shingle sections to their original position
- Align shingles precisely above the new pipe jack
- Use roofing nails to secure shingle edges
- Maintain consistent overlap patterns
When working with pipe jack roofing, every detail counts. I start by placing the bottom shingle, making sure it covers the jack’s edge. Then, I secure it with three nails, angled to keep water out.
| Shingle Replacement Step | Key Considerations |
|---|---|
| Bottom Shingle Placement | Overlap jack flange by minimum 2 inches |
| Nail Positioning | Use 3 nails per shingle section |
| Overlap Pattern | Maintain existing roof’s original layout |
By using these exact steps, you’ll get a top-notch pipe jack roofing job. It will keep your home safe from water damage and keep your roof strong.
Regional Considerations for Pipe Jack Installation
Location is key when installing pipe jacks. Different areas have their own challenges that can affect your roofing project.
Choosing the right materials is vital for lasting performance. In harsh weather, galvanized steel is a top pick for pipe jack installations. It makes your roof strong against many environmental issues.
Climate-Specific Requirements
Climate zones affect pipe jack choice and installation methods. Here are important factors to consider:
- UV exposure intensity
- Annual precipitation levels
- Temperature fluctuations
- Wind speed and direction
Local Building Codes
Knowing local building codes is essential for installing a lead pipe jack roof system. Each area has its own rules that can change how you install.
| Region | Recommended Material | Key Installation Considerations |
|---|---|---|
| Coastal Areas | Galvanized Steel | Corrosion-resistant coating |
| Mountain Regions | Heavy-Duty Steel | Snow load resistance |
| Desert Regions | UV-Resistant Materials | Heat deflection properties |
By looking at your area’s specific needs, you can get a strong and lasting pipe jack installation. It will meet environmental challenges and local rules.
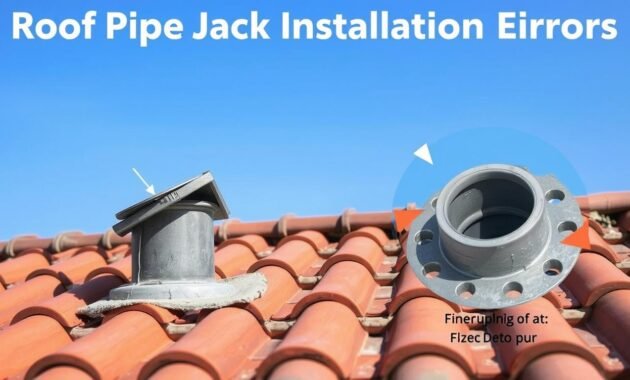
Common Installation Mistakes to Avoid

Working with a pipe jack on a roof can be tricky, even for DIY experts. Knowing the common mistakes helps you avoid costly repairs later. It ensures a successful roof jack replacement.
One big mistake is choosing the wrong size for your roof jack. It must fit the vent pipe’s diameter and the roof’s slope perfectly. The wrong size can cause water damage and harm the structure.
- Neglecting proper measurements before installation
- Using incorrect flashing materials
- Failing to check surrounding shingle condition
- Skipping thorough waterproofing steps
Another mistake is not sealing well enough. Use top-notch roofing sealant for the job. Apply it around the pipe jack’s base to keep water out.
Poor installation can lead to serious problems:
- Water leakage into attic spaces
- Accelerated roof deterioration
- Potential structural damage
- Voiding manufacturer warranties
Always check the shingles around the pipe jack area. Damaged shingles can weaken the roof. Make sure to replace any bad shingles for a solid installation.
Maintenance Tips for Long-Lasting Performance
Keeping your pipe jack roof vent in good shape is key to protecting your home. It helps prevent water damage and keeps your roof working well for years. Regular care can make a big difference in your roof’s life.
Each type of roof vent, like pipe jack or split boot, needs its own care routine. Here are my best tips to keep your roof vent in great shape:
- Do visual checks twice a year, in spring and fall
- Look for wear, cracks, or loose seals on the pipe jack
- Clear away debris and leaves from the vent area
- Watch for water stains or moisture in your attic
Regular upkeep can save you from expensive fixes. Clean the pipe jack roof vent area gently with a soft brush. Make sure to check the sealant and the flashing and shingles around it. These spots are most likely to leak.
Important maintenance steps include:
- Put on new roofing sealant every 3-5 years
- Replace damaged or old flashing right away
- Check after bad weather hits
- Make sure there’s good ventilation around the pipe jack
By sticking to these maintenance tips, you’ll keep your roof safe and avoid water damage. A bit of care now can help your pipe jack roof vent last longer.
Conclusion
Understanding pipe jacks roofing installation might seem hard at first. But, with the right information, you can keep your home safe. I’ve shown you the key steps, from the basics to a professional installation.
Installing pipe jacks is more than just a fix. It’s about protecting your home from water damage and ensuring your roof lasts long. This guide gives you the basics to handle this important job.
While DIY skills are great, sometimes you need a pro. If you hit a snag or are unsure, getting help from a licensed roofer is wise. Your home’s safety is worth it.
Using the tips from this guide, you’ll be ready to keep your roof strong and leak-free. Your roof will handle all kinds of weather, keeping your home safe for years.


