When building a shed, ensuring it is protected from water damage is crucial. While interior waterproofing is often emphasized, exterior protection is equally important due to exposure to rain, snow, and other weather conditions.
One effective way to safeguard your shed is by installing a drip edge. This guide provides detailed instructions on how to install a drip edge on shed roofs, whether they are new or existing.
Why Install a Drip Edge?
As someone who has been constructing sheds for over 15 years, I can confirm the significance of installing a drip edge. Water can severely damage wood, and without proper protection, roof sheeting can deteriorate quickly. A drip edge helps shield the roof decking and fascia board from water damage, ensuring the shed’s longevity.
Read also: How to Install Drip Edge on a Metal Roof on Your Own
Required Tools and Materials
Before beginning the installation, gather the following tools and materials:
- Drip edge
- Hammer
- Roofing nails
- Tin snips or aviation shears
- Measuring tape
- Caulk gun
- Roofing sealant or caulk
- Ladder or scaffolding
- Safety goggles and gloves
- Underlayment (optional but recommended)
Having all these tools and materials at hand will facilitate a smooth installation process.
Step-by-Step Installation Guide
Step 1: Measure and Cut the Drip Edge
- Start at the Eaves: Measure the length of the eaves to determine the required length of the drip edge. It should extend slightly beyond the edge to direct water away from the shed.
- Cut to Length: Use tin snips to cut the drip edge to the needed length. Wearing safety gloves and goggles is advisable due to the sharp edges.
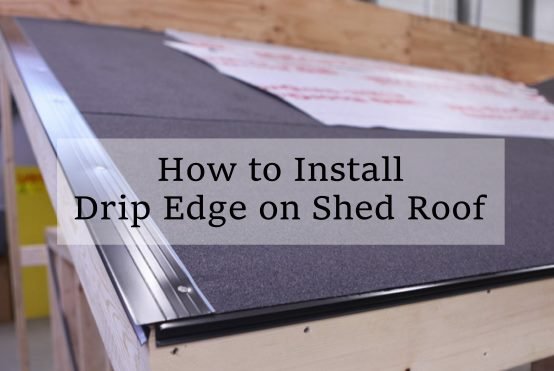
Step 2: Install the Drip Edge
- Align the Drip Edge: Position the drip edge along the eaves, ensuring the flared or flanged tip faces away from the roof and points downward. This alignment prevents water from running back towards the roof.
- Secure with Nails: Fasten the drip edge with roofing nails, spacing them about 12 inches apart. The nails should be placed high up on the drip edge, covered by shingles.
Read also: What is a Cricket in Roofing and What Size You Should Install?
Step 3: Overlap Sections
- Proper Overlap: When installing multiple sections, ensure each piece overlaps the previous one by at least one inch to prevent water from seeping between the sections.
- Cut for Corners: At corners where the eave meets the rake edge, cut for a proper fit. Mark a spot one inch beyond where the drip edge starts to overhang and cut accordingly.
Step 4: Install on Rakes
- Forming Corners: Bend the flap of the drip edge to form a corner. This will be completed when the drip edge is installed on the rakes.
- Laying Underlayment: After the drip edge is installed on the eaves, lay the underlayment so it sits under the drip edge on the rake area but above the drip edge on the eave area.
Step 5: Final Installation
- Secure Rake Edge: Install the drip edge on the rake using nails, similar to the eave installation method.
- Cover Top Edge: For the top edge of the shed roof, cut shingles in the final row to strip a shape that will cover nails, then apply sealant on the nails and all over the top edges.
Personal Insights and Advice
From my years of experience, the choice of material for the drip edge is crucial. Aluminum is lightweight and resistant to corrosion, making it a popular choice. Galvanized steel offers more durability but is heavier and harder to work with. PVC is affordable and easy to handle, suitable for areas with mild weather conditions.
Proper sealing is also vital. Many installations fail due to poor sealing at the joints. Using a high-quality roofing sealant and applying it generously along the joints, corners, and any gaps ensures a watertight barrier.
Common Mistakes to Avoid
- Incorrect Measurements: Double-check measurements to ensure the drip edge extends adequately beyond the fascia board.
- Improper Positioning: The drip edge should be positioned under the roofing material, extending over the eaves and into the gutter.
- Insufficient Fastening: Use the correct fasteners, spaced according to manufacturer recommendations, to secure the drip edge firmly.
- Ignoring Building Codes: Consult local building codes to ensure compliance with specific requirements related to drip edge installation.
Comparison of Drip Edge Materials
| Material | Pros | Cons |
|---|---|---|
| Aluminum | Lightweight, corrosion-resistant | Less durable than steel |
| Galvanized Steel | Extremely durable, weather-resistant | Heavy, can be harder to cut |
| PVC | Affordable, easy to work with | Less durable in harsh weather |
Conclusion
Knowing how to install drip edge on shed roof can save you from significant repair costs in the future. By following this guide, you can ensure your shed remains protected from water damage. Remember to measure accurately, position the drip edge correctly, secure it firmly, seal all joints, and comply with local building codes.


