Are you tired of unexpected temperature changes and thermostat failures? Many homeowners face frustrating HVAC issues due to ignored battery maintenance. Your Honeywell thermostat might be quietly signaling battery problems that could affect your home’s comfort and climate control.
Fortunately, replacing the Honeywell thermostat battery is easy and can prevent temperature swings. By learning how to change the thermostat battery, you can keep your HVAC system running well. I’ll show you how to replace the Honeywell battery with ease and confidence.
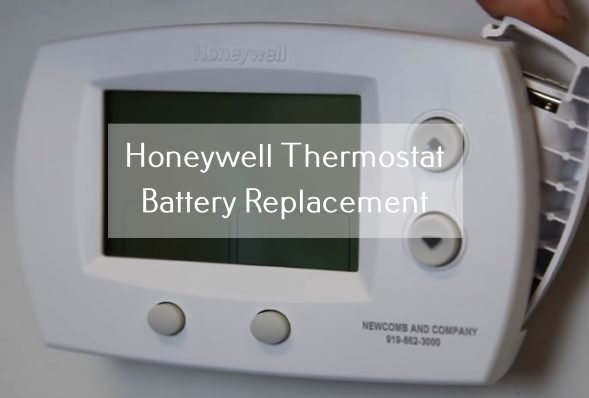
Understanding When Your Thermostat Needs New Batteries
It’s important to keep an eye on your Honeywell thermostat’s battery health. A thermostat power issue can happen without warning, affecting your home’s comfort.
Your Honeywell thermostat has smart battery features. It warns you 60 days before the batteries run out.
Read also: Creaking Noise in Water Heating System
Low Battery Warning Signs
- Flashing battery icon on the display
- Dimmed or flickering screen
- Intermittent beeping sounds
- Unexpected HVAC system behavior
Battery Life Expectancy
Knowing when your thermostat stops working often depends on battery care. Here’s a quick guide:
| Battery Type | Average Lifespan | Recommended Replacement |
|---|---|---|
| AA/AAA Alkaline | 3-5 years | Annually |
| 9-Volt | 2-4 years | Every 2 years |
| Lithium Button Cell | 3-5 years | When performance drops |
Impact of Dead Batteries on HVAC System
A dead battery can cause big problems with your home’s temperature. Without power, your thermostat can’t talk to the HVAC system. This might leave you without heat or cool air when you need it.
- Loss of temperature programming
- Inability to control heating/cooling
- Potential system reset requirements
- Risk of uncomfortable home temperatures
By following your Honeywell battery guide, you can avoid thermostat problems. This keeps your home comfortable.
Essential Tools and Materials for Battery Change
Before you start changing the battery in your Honeywell thermostat, make sure you have the right tools. Most Honeywell thermostats need simple tools that you probably have at home.
Here’s a list of tools and materials you’ll need for your thermostat battery replacement:
- AA or AAA alkaline batteries (specific to your thermostat model)
- Flat-head screwdriver
- Flashlight (for better visibility)
- Soft cloth or paper towel
Before you start, check your Honeywell thermostat model’s user manual. Different models might need different batteries.
| Thermostat Type | Battery Requirements | Typical Replacement Frequency |
|---|---|---|
| Standard Programmable | 2 x AAA Alkaline | Once per year |
| Digital Non-Programmable | 2 x AA Alkaline | Every 12-18 months |
| Smart Thermostats | Varies by model | Depends on usage and model |
Pro tip: Keep spare batteries on hand to keep your thermostat working well. High-quality batteries can last up to five years. But, it’s best to replace them every year to avoid problems.
By getting these essential tools and knowing your Honeywell thermostat’s battery needs, you’ll be set for a successful battery replacement.
Locating the Battery Compartment in Different Models
Finding the battery compartment is key when you need to replace the thermostat battery. Honeywell thermostats come in many models, each with its own way to access the battery.
Knowing where the battery compartment is depends on your thermostat model. I’ll show you the most common spots to find it. This will help you replace the battery easily.
Wall-Mounted Thermostat Access
Wall mount thermostats need you to remove the whole unit to get to the battery. Here’s how:
- Gently pull the thermostat away from the wall
- Look for a small release mechanism or clip
- Locate the battery compartment on the back of the unit
Side-Loading Battery Compartments
Many Honeywell models have side-loading battery compartments. They make changing batteries quick and easy:
- Find a small tab on the side of the thermostat
- Press the tab to release the battery compartment
- Slide out the battery tray carefully
Front Panel Battery Access
Newer thermostat models have battery compartments on the front. This design lets you change batteries without taking the unit off the wall.
- Look for a small cover on the front panel
- Gently snap or slide open the battery compartment
- Replace batteries while the thermostat remains mounted
Pro tip: Always check your model’s user manual if you’re not sure where the battery compartment is. Each Honeywell thermostat model might have slight differences in design.
Choosing the Right Battery Type for Your Honeywell Thermostat

Choosing the right battery for your Honeywell thermostat is key for its best performance. Not all batteries are the same. Using the wrong one can cause problems with your home’s temperature.
Most Honeywell thermostats need specific batteries for reliable work. Here are the common ones:
- AA alkaline batteries
- AAA alkaline batteries
- 3V lithium batteries
- 9-volt batteries
When picking a battery, consider these important points:
- Check your thermostat’s user manual for exact battery specs
- Make sure the battery fits your thermostat’s compartment
- Choose high-quality batteries from trusted brands
- Think about how long the battery will last and how well it will work
About 70% of Honeywell thermostats use batteries. Using the wrong ones can cause 90% of users to have problems. To keep your thermostat working well, replace the batteries every year. Make sure they match your model’s needs.
Pro tip: Opt for batteries with longer warranties. They usually mean better quality and last longer. More and more people, 40%, are choosing rechargeable batteries for their eco-friendly benefits.
Choosing the right battery is more than just powering your thermostat. It’s about keeping your home comfortable and avoiding strain on your HVAC system.
Step-by-Step Honeywell Thermostat Battery Replacement
Replacing the batteries in your Honeywell thermostat is easy. It keeps your home comfortable and saves energy. I’ll guide you through the steps for a smooth battery change.
- New AA or AAA alkaline batteries
- Soft cloth
- Small screwdriver (if needed)
Removing Old Batteries Safely
When replacing the battery, safety is key. Follow these steps:
- Turn off your HVAC system at the circuit breaker
- Gently remove the thermostat cover
- Observe the current battery orientation
- Carefully remove the old batteries
Proper Battery Installation
Installing new batteries needs care. Make sure the positive and negative terminals match the old ones.
| Battery Type | Recommended Replacement Frequency |
|---|---|
| AA Alkaline | Every 1-2 years |
| AAA Alkaline | Every 1-2 years |
Restoring Thermostat Settings
After replacing the batteries, your thermostat might need calibration. Check your model’s manual for the reset steps. Most Honeywell models keep your settings, but some might need manual reprogramming.
Pro tip: If your thermostat shows a low battery warning, replace the batteries quickly. This prevents system problems.
Common Issues During Battery Replacement Process
Replacing your Honeywell thermostat batteries can sometimes present unexpected challenges. I’ve worked with various home heating systems and seen several common issues. These can make the replacement process more complicated.
- Difficulty removing the thermostat from wall mount
- Confusion about battery orientation
- Problems reinstalling battery compartment
- Thermostat settings reset after battery change
When trying to fix thermostat errors, users often face frustrating moments. The most common problems include:
- Incorrect battery placement
- Misaligned battery contacts
- Potential circuit breaker complications
Honeywell battery tips suggest checking the circuit breaker if your thermostat doesn’t work after battery replacement. A tripped breaker could be stopping the system from working right.
| Common Issue | Potential Solution |
|---|---|
| No Display After Battery Change | Check battery orientation and contact points |
| Settings Lost | Manually reprogram thermostat settings |
| System Not Responding | Verify circuit breaker and perform system reset |
Remember to handle your thermostat carefully during battery replacement. Use gentle movements and align carefully to avoid most installation errors. If you keep having problems, it might be best to get help from a professional HVAC technician.
Maintaining Your Thermostat After Battery Change
After you’ve changed your thermostat batteries, it’s important to keep it in good shape. This ensures it works well for a long time. Here are some tips to help you maintain your Honeywell thermostat.
Creating a Regular Maintenance Schedule
Having a regular maintenance plan is essential for your thermostat. I suggest checking the batteries once a year, right before the big temperature changes. Many people find it best to replace batteries in early spring and fall for better maintenance.
- Replace batteries once per year
- Check battery status during seasonal transitions
- Mark your calendar for annual battery inspections
Gentle Cleaning Techniques
Keeping your thermostat clean is important to avoid dust buildup. Use a soft, dry microfiber cloth to clean it. Stay away from liquid cleaners or harsh chemicals that could harm the electronics.
Performance Monitoring Strategies
After changing the batteries, watch how your thermostat performs. Make sure it shows the right temperature and your HVAC system works as it should. If you notice any odd temperature changes or slow system responses, it might need more maintenance.
- Verify temperature accuracy weekly
- Test heating and cooling modes
- Listen for unusual system sounds
By sticking to these maintenance tips, you’ll make your Honeywell thermostat last longer. This will keep your home comfortable and save energy.
Troubleshooting Post-Battery Replacement Problems
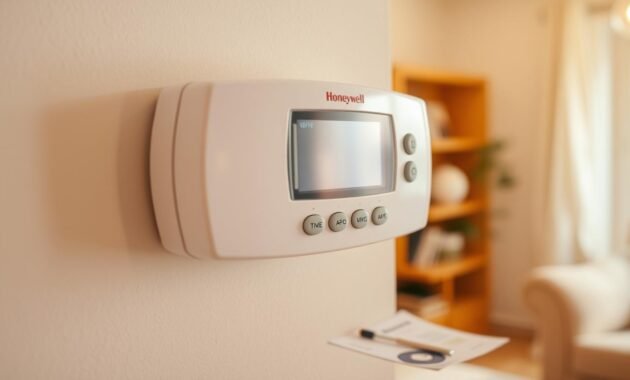
After you replace your Honeywell thermostat batteries, you might face some unexpected problems. There are helpful thermostat troubleshooting tips to quickly solve these issues.
If your thermostat doesn’t work right after a battery change, don’t worry. I’ll share some effective Honeywell thermostat fix strategies. These tips can save you a lot of time and stress.
- Check battery orientation carefully
- Verify the thermostat is properly mounted
- Perform a system reset if needed
If the screen stays blank or doesn’t react, try these steps:
- Remove batteries completely
- Wait 30 seconds before reinserting
- Ensure batteries are fresh and correctly installed
| Common Issue | Potential Solution |
|---|---|
| Blank Screen | Reset system or replace batteries |
| Incorrect Temperature Reading | Recalibrate thermostat settings |
| No System Response | Check circuit breaker and wiring |
If DIY troubleshooting doesn’t fix the problem, it’s time to call a pro. Some issues might show a bigger HVAC problem that needs a professional’s help.
Read also: How to Fix Unbalanced Washer
Remember, being patient is important when troubleshooting your thermostat. Most problems can be fixed with careful attention and basic technical skills.
Prevention Tips for Extended Battery Life
Keeping your Honeywell thermostat’s battery life up is easy. I’ve found simple ways to boost battery performance and avoid sudden power loss.
Choosing the right batteries is key for good thermostat battery life. Here are my best picks:
- Select high-quality alkaline batteries made for electronic devices
- Avoid cheap or generic batteries that don’t last
- Make sure the battery type fits your Honeywell model
It’s important to protect your thermostat from extreme temperatures. Keep it away from direct sunlight, heating vents, and cold drafts.
| Battery Type | Average Lifespan | Performance Rating |
|---|---|---|
| Alkaline AA | 12-18 months | High |
| Lithium | 24-36 months | Very High |
If you want to fix Honeywell thermostat battery problems early, try these tips:
- Check battery health every three months
- Have spare batteries ready
- Clean battery contacts to ensure a good connection
- Watch for low battery warnings
By following these steps, you’ll greatly improve your thermostat’s battery life. This will also stop sudden system failures.
Conclusion
Learning to replace thermostat batteries is key for a comfy home. Regular Honeywell thermostat care stops system failures. It keeps your home just right.
Stay ahead with battery swaps. Honeywell thermostats need new batteries every 6-12 months. Watch for low battery alerts and know your thermostat’s needs to dodge HVAC issues.
Good battery care is more than just changing batteries. Use top-notch batteries, check terminals, and link to smart homes. Dispose of old batteries right and follow the maker’s advice for the best results.
Replacing thermostat batteries is more than upkeep. It’s about keeping your home cozy and saving energy. With a bit of effort, your Honeywell thermostat will keep your home comfortable for years.
