Are you fed up with brass fitting leaks that waste water and harm your home? Plumbing problems can quickly become costly repairs if ignored. Dripping pipes raise your water bill and can damage your home’s structure over time.
I’ll share effective ways to prevent brass fitting leaks. This guide will help you fix these issues like a pro. You’ll learn how to stop leaks, saving you time, money, and avoiding costly repairs.
Understanding Different Types of Brass Fittings
Brass fittings are key in plumbing systems, making important connections between pipes. As a professional plumber, I’ve seen many fittings that serve different needs. Let’s look at the main types of brass fittings used in homes and businesses.
Essential Brass Fitting Varieties
Knowing about brass fittings helps spot and stop leaks in plumbing. Here are the main types:
- Elbows: Change pipe direction at 45 or 90-degree angles
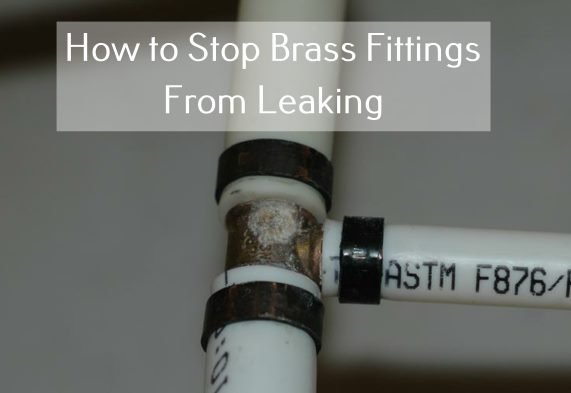
- Tees: Split or combine pipe flows in three directions
- Couplings: Connect two pipes of the same diameter
- Adapters: Ensure compatibility between different pipe types
- Bushings: Reduce pipe sizes for precise connections
- Caps and Plugs: Seal pipe ends and prevent leakage
Read also: 5 Most Used Types of Plumbing Piping
| Fitting Type | Primary Function | Common Applications |
|---|---|---|
| Elbows | Change pipe direction | Plumbing, HVAC systems |
| Tees | Split or combine flows | Water distribution, drainage |
| Couplings | Connect identical pipes | Pipe extensions, repairs |
| Adapters | Connect different pipe types | Transitioning between materials |
| Bushings | Reduce pipe sizes | Precision connections |
| Caps/Plugs | Seal pipe ends | Blocking pipe openings |
Each brass fitting has its own role in keeping your plumbing system working well. Choosing the right fitting is key to avoiding leaks and ensuring your system runs smoothly.
Common Causes of Brass Fitting Leaks
To stop leaks in threaded brass fittings, first find out why they leak. Leaks can come from many places. Each one needs a different fix to work well.
There are key things that can cause brass fittings to leak:
- Improper Installation Techniques
- Cross-threading during initial setup
- Insufficient tightening of connections
- Misaligned pipe connections
- Material Degradation
- Corrosion from chemical reactions
- Metal fatigue over time
- Mechanical stress
Things around us can also affect brass fittings. Changes in temperature, vibrations, and water pressure can make fittings wear out faster.
| Leak Cause | Primary Impact | Prevention Strategy |
|---|---|---|
| Installation Errors | Immediate Possible Failure | Proper threading, correct torque |
| Material Wear | Slow Decline in Performance | Regular check-ups, timely replacement |
| Environmental Stress | Fast Degradation | Protective coatings, managing pressure |
Knowing why fittings might leak helps you fix problems before they get worse. This way, you can avoid big plumbing issues.
Essential Tools and Materials for Leak Prevention
To stop brass fitting leaks, you need the right tools and materials. I’ll show you what you must have for a top-notch installation. Having the right tools can save you time and protect your plumbing.
Choosing the right tools for brass fittings is key. You’ll need special gear for efficient and safe work.
Must-Have Tools for Brass Fitting Maintenance
- Adjustable wrench with smooth jaws
- Pipe wrench (carefully designed to prevent surface damage)
- Pipe threader
- Pipe reamer
- Thread gauge
Use high-quality tools made for brass fittings. Cheap tools can scratch or damage the fittings, making them less effective.
Essential Materials for Leak Prevention
| Material | Purpose | Recommended Use |
|---|---|---|
| Teflon Tape | Sealing threads | Wrap 2-3 times clockwise |
| Pipe Sealant | Additional thread protection | Apply sparingly on metal threads |
| Clean Rags | Surface preparation | Remove debris before installation |
Installing properly takes patience and the right tools. With quality tools and materials, you’ll avoid brass fitting leaks.
How to Stop Brass Fittings from Leaking

Stopping leaks in brass plumbing needs precision and the right steps. I’ll show you how to seal brass fittings well and avoid water damage later.
First, find where the leak is. Look closely at the brass fitting for wear, corrosion, or damage. Small cracks or loose connections can lead to leaks that harm your plumbing.
- Check for visible water droplets or moisture around the fitting
- Look for white mineral deposits or green oxidation
- Examine thread connections for gaps or misalignment
Getting ready is important when sealing brass fittings. Make sure you have these tools before you start:
- Adjustable wrench
- Pipe thread sealant
- Clean cloth or rag
- Teflon tape
To stop leaks in brass plumbing, clean the threads well. Use a wire brush or cloth to remove old sealant, dirt, or corrosion. Then, apply a thin layer of pipe thread sealant or wrap Teflon tape clockwise around the male threads. Make sure to cover them fully.
Now, tighten the fitting carefully. Use an adjustable wrench and apply steady, controlled pressure. Don’t over-tighten, as it can damage the threads or cause more leaks. A quarter to half turn past hand-tight is usually enough for a good seal.
Understanding Thread Standards and Compatibility
Brass fitting leak solutions rely on knowing thread standards. To stop leaks, it’s key to understand the main thread types. If threads don’t match, it can cause big problems in plumbing and mechanics.
There are many thread standards to ensure connections are right and sealed well. I’ll explain the most common ones you’ll find in real-world use.
Identifying Critical Thread Standards
When dealing with brass fittings, you’ll mostly see four main thread standards:
- SAE (Society of Automotive Engineers): Common in cars and hydraulic systems
- NPT (National Pipe Taper): Used in most plumbing and industrial setups
- JIC (Joint Industry Council): Common in aerospace and high-pressure systems
- SI (Système International): Metric thread standard for international manufacturing
Each thread type has its own features that affect leak solutions. For example, NPT threads seal with a tapered design. JIC threads need precise angles to prevent leaks.
Compatibility Considerations
Choosing the right thread standard is important. Always check the manufacturer’s specs and use precise tools for perfect compatibility. If threads don’t match, connections can be weak, leading to leaks and system failures.
Professional tip: Always check the thread type and pitch before installing. This ensures a secure, leak-free connection in your brass fitting projects.
Proper Installation Techniques
Proper installation of brass fittings is key to avoiding leaks. I’ll show you the important steps for a watertight connection. This connection will last under pressure and time.
Read also: How to Cut Durock: 3 Simplest Ways
Waterproofing brass fittings starts with preparation. Before you start, make sure you have all the tools you need. Also, know the specific needs of your plumbing project.
- Clean all surfaces thoroughly before installation
- Inspect threads for any damage or imperfections
- Use appropriate thread sealants or tape
Thread alignment is critical in installation. Start threading by hand to avoid cross-threading. This can weaken the fitting. Align the threads carefully and turn slowly for a smooth fit.
Torque is also important. Avoid two mistakes:
- Under-tightening, which can cause leaks right away
- Over-tightening, which can damage the threads or create stress points
A torque wrench helps you get the right tightness. Each brass fitting has its own torque needs. Always check the manufacturer’s guidelines for the exact amount.
By using these installation techniques, you’ll lower the risk of leaks. Your brass fittings will work well for many years.
Using Teflon Tape and Thread Sealants
Maintaining brass plumbing connections is all about smart sealing. Teflon tape and thread sealants are key to preventing leaks. They help create tight seals that keep your plumbing system safe.
Let’s explore how to apply these essential sealing materials. Knowing the right way to use them can stop water leaks and keep your plumbing connections strong for a long time.
Teflon Tape Application Techniques
- Clean threads thoroughly before application
- Wrap tape clockwise around male pipe threads
- Use 3-4 wraps for standard connections
- Ensure tape is smooth and flat against threads
Thread Sealant Best Practices
- Select appropriate sealant for your specific brass fitting
- Apply thin, even layer on threads
- Avoid over-application which can cause excess buildup
- Allow proper curing time before pressurizing system
Mastering these techniques will boost your leak prevention skills. Proper use of Teflon tape and thread sealants is vital for durable plumbing. It ensures your plumbing system works well for years.
Maintenance and Inspection Protocols

To keep brass plumbing connections in top shape, it’s key to prevent leaks. I’ve put together a detailed maintenance plan. It helps homeowners spot issues early, avoiding expensive repairs.
Regular checks are vital for your plumbing’s health. I suggest setting up a maintenance routine. This way, you can catch leaks and wear before they get worse.
- Conduct visual inspections every three months
- Check for signs of corrosion or mineral buildup
- Test pipe connections for minor leaks
- Clean brass fittings to prevent degradation
Focus on these important areas during maintenance:
| Inspection Area | What to Look For | Recommended Action |
|---|---|---|
| Pipe Connections | Discoloration, white residue | Clean and apply sealant if needed |
| Brass Fittings | Green or blue oxidation | Replace if significant corrosion exists |
| Pipe Joints | Moisture or slight wetness | Reapply thread tape or sealant |
Following these maintenance steps will greatly lower the chance of leaks. It also makes your brass plumbing last longer. A little care now can save you a lot of money later.
Troubleshooting Existing Leaks
Finding a leak in your brass fittings can be annoying. But, with the right tools, you can find and fix it fast. To repair leaks, you need to find where the problem starts.
Let’s explore some effective ways to fix brass fitting leaks. These methods can save you time and prevent water damage:
Leak Detection Techniques
- Visual Inspection: This is the simplest way to spot leaks. Look for:
- Water droplets or moisture around fittings
- Corrosion or mineral buildup
- Discoloration on pipes or surrounding areas
- Advanced Detection Tools:
- Electronic leak detectors
- Ultrasonic leak detection devices
- Thermal imaging cameras
To fix leaks, first check the connection points. Use electronic leak detectors for hidden leaks. Ultrasonic devices listen for water sounds. Thermal cameras spot temperature changes from moisture.
Diagnostic Steps
- Identify the leak location precisely
- Determine the cause (loose fitting, damaged threads, etc.)
- Select appropriate repair method
- Gather necessary tools and materials
For small leaks, tightening or using thread sealant might work. But bigger leaks might need a new fitting. Always be safe and call a pro if unsure.
Conclusion
I’ve shown you how to stop brass fittings from leaking. It might seem hard at first, but with practice, you’ll get better. You’ll learn to manage your plumbing system like a pro.
Fixing leaks isn’t just about quick fixes. It’s about knowing your stuff, using the right tools, and keeping up with maintenance. I’ve given you tips on thread standards, sealants, and how to find and fix leaks.
Every plumbing problem is a chance to get better. By using what we’ve talked about, you can keep your home safe and save money. Learning about your brass fittings will make your plumbing system more reliable in the long run.
As you fix more leaks, you’ll feel more confident. Keep learning, stay proactive, and ask for help when you need it. With these tips, you can keep your pipes dry and your plumbing working well.


