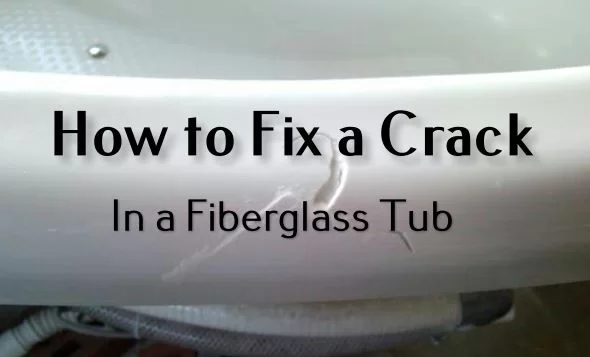
Finding a crack in your fiberglass tub can be really frustrating. It can lead to water damage, leaks, and ugly marks. These problems can make your bathroom look bad and even cause more damage if not fixed.
But, fixing a fiberglass tub is easier than you might think. With the right tools and methods, you can make your shower pan look new again. This guide will help you learn how to fix cracks and avoid more damage in the future.
Whether it’s a small chip or a big crack, I’ll show you how to fix it. You’ll learn how to do it yourself and save a lot of money. Let’s make your fiberglass tub look like new again!

Understanding Fiberglass Tub and Shower Pan Damage
Fiberglass tubs and shower pans are loved for being affordable and light. But, they can get damaged over time. Knowing why and how cracks happen helps you fix them right.
Common Causes of Cracks and Chips
Several things can cause cracks in fiberglass tubs and showers:
- Heavy impact from dropped objects
- Structural settling and house movement
- Extreme temperature changes
- Improper installation
- Age-related wear and material fatigue
Types of Damage You Can Fix at Home
You can fix some damage yourself. Here are a few examples:
- Small surface chips (less than 1/4 inch)
- Hairline cracks
- Superficial scratches
- Minor impact dents
When to Call a Professional
Some damage needs a pro. Here are the times to call for help:
- Cracks wider than 1/2 inch
- Structural damage near support areas
- Multiple interconnected cracks
- Extensive surface deterioration
| Damage Type | Repair Difficulty | Estimated Cost |
|---|---|---|
| Small Chips | Easy | $20-$50 |
| Hairline Cracks | Moderate | $50-$120 |
| Large Structural Damage | Complex | $200-$240 |
Understanding the damage helps you choose the right fix. With the right steps, you can make your fiberglass tub and shower last longer.
Essential Tools and Materials for Fiberglass Repair
Getting ready for a fiberglass repair means you need the right tools and materials. I’ll show you what you need to fix your bathtub shower pan or fiberglass surface.
First, gather all the tools you’ll need. A fiberglass repair kit has important items that help you do the job well.
Essential Repair Kit Components
- Fiberglass cloth for reinforcement
- Epoxy resin and hardener
- Mixing containers
- Disposable brushes
- Mixing sticks
- Spreader or applicator
Additional Tools You’ll Need
- Sandpaper (220, 320, 400, and 600 grit)
- Utility knife
- Cleaning supplies
- Ventilator mask
- Safety glasses
- Protective gloves
For your repair kit, pick a paste-type one. These are simpler to use than sprays and give better looks.
| Material | Purpose | Recommended Grit/Type |
|---|---|---|
| Sandpaper | Surface Preparation | 220-600 grit |
| Fiberglass Cloth | Reinforcement | Lightweight weave |
| Epoxy Resin | Bonding and Sealing | Marine-grade recommended |
Remember, safety is key when fixing fiberglass. Always wear a ventilator mask to avoid harmful fumes from epoxy. With the right prep and tools, you’ll fix your bathtub shower pan or fiberglass surface well.
Choosing the Right Repair Kit for Your Project
Fixing a crack in a fiberglass bathtub shower needs the right repair kit. I’ll guide you through epoxy kits to ensure your fix looks great and lasts long.
Understanding Epoxy Kit Options
Repair kits vary in quality. I’ve looked into the best ones for fixing your fiberglass bathtub:
- Rust-Oleum Tub and Tile Refinishing Kit (Covers up to 110 square feet)
- Keeney Tub Repair Kit (Covers 1.5 square feet)
- Bathworks Tub and Tile Chip Repair Kit (Handles up to 12 chips)
- Ekopel 2K Bathtub Refinishing Kit (Full tub coverage)
Color Matching Considerations
Choosing the right color is key for a good fix. Look for kits with:
- Color-matched compounds
- Blending options for seamless repairs
- Multiple color variations
Balancing Quality and Cost
| Factor | Importance | Impact on Repair |
|---|---|---|
| Coverage Area | High | Determines total repair capacity |
| Curing Time | Medium | Impacts project schedule |
| Price | Medium | Options for all budgets |
| Durability | Very High | Guarantees lasting fix |
Pro tip: Quality repair kits can add 10 to 15 years to your bathtub’s life. Choose a kit with clear instructions and all needed materials for a successful fix.
Safety Precautions and Preparation Steps

When fixing crack fiberglass surfaces, safety comes first. You need to prepare carefully and protect yourself. This ensures your health and the success of your project.
Before starting, make sure you have the right safety gear. You’ll need to protect yourself from harmful chemicals and dust.
Essential Safety Gear
- Safety goggles to protect your eyes
- Approved respirator mask with chemical filtration
- Disposable gloves
- Long-sleeved clothing
- Work area ventilation equipment
Workspace Preparation
Creating a safe environment is key when fixing fiberglass. Work in a well-ventilated area, like near an open window or with a fan. This helps avoid trapped chemical fumes.
| Preparation Step | Details |
|---|---|
| Ventilation | Open windows, use fans, create air circulation |
| Surface Protection | Cover surrounding areas with drop cloths |
| Chemical Safety | Keep repair materials away from food and drink |
Proper preparation is vital for a successful repair. Setting up your workspace and protecting yourself ensures a safer, more effective fix.
How to Fix a Crack in a Fiberglass Tub
Fixing a crack in your fiberglass tub might seem tough, but it’s doable with the right steps. About 30% of homeowners deal with fiberglass tub damage in the first 5 years. So, it’s a common fix for many.
I’ll guide you through fixing a crack in your fiberglass tub. The main thing is to prepare well and apply repair materials carefully.
Surface Cleaning Techniques
Cleaning the surface right is key for a good repair. Here’s what to do:
- Clear the crack area of dirt, soap scum, and debris
- Wash with a degreasing cleaner made for fiberglass
- Use a lint-free cloth to dry the area completely
- Make sure the surface is clean and dry before you start fixing
Proper Sanding Methods
Sanding gets the surface ready for repair. Here’s how to do it:
- Use fine-grit emery cloth (220-grit is best)
- Sand the crack and around it gently
- Make the surface a bit rough for better bonding
- Wipe off sanding dust with a clean, dry cloth
Applying the Repair Solution
When you apply the repair solution, be precise. Here’s how to do it right:
- Pick a top-notch epoxy repair kit for fiberglass
- Mix the epoxy as the maker says
- Put on the solution in thin, even layers
- Make the repair go at least 1 inch beyond the crack
- Add fiberglass cloth for extra strength
By following these steps, you can fix a crack in your fiberglass tub well. Remember, good prep and careful application are the secrets to a lasting fix.
Proper Surface Preparation Techniques
Fixing a crack in a fiberglass shower pan starts with surface prep. I’ll show you how to get your surface ready for repair.
Before you start fixing the crack, follow these important steps:
- Use a sharp utility knife to create a V-shaped groove around the damaged area
- Cut through the color layer into the underlying structure
- Remove any loose debris or damaged material
- Clean the surface thoroughly with acetone
Fixing composite materials can save you up to 50% compared to replacing the whole thing. The trick is to make the surface right for bonding. I suggest sanding an area at least 2 inches beyond the damaged section of the shower pan.
When prepping the surface, keep these tips in mind:
- Start with 80-grit sandpaper for initial rough sanding
- Progress to 240-grit sandpaper for a smoother finish
- Clean the area with acetone to remove any contaminants
- Ensure the surface is completely dry before applying repair materials
Remember, safety comes first. Always wear protective gear like gloves, eye protection, and a dust mask to avoid fiberglass particles.
Mixing and Applying the Epoxy Compound
Fixing a crack in a fiberglass tub shower needs precision and skill. The success of your repair depends on mixing and applying the epoxy compound correctly. I’ll show you the important steps for a professional fix.
Correct Mixing Ratios
It’s vital to mix the epoxy right for a strong repair. Most epoxy kits have specific mixing instructions. Here are some key tips:
- Carefully measure the resin and hardener components
- Follow the manufacturer’s recommended ratio precisely
- Use a clean mixing cup dedicated to the repair
- Mix thoroughly for 2-3 minutes to ensure complete integration
Application Methods
When applying the epoxy, use these professional techniques:
- Apply a thin, even layer using a plastic spreader
- Work from the center of the crack outward
- Ensure complete coverage of the damaged area
- Remove any excess compound immediately
Common Mixing Mistakes to Avoid
These common errors can ruin your repair:
- Rushing the mixing process
- Using incorrect proportions of components
- Mixing on an unclean surface
- Working in extreme temperatures
A successful repair can save you hundreds of dollars. Take your time, follow the instructions carefully, and you’ll get a professional-looking fix for your fiberglass tub.
Finishing and Smoothing the Repair
After fixing a crack in your fiberglass bathtub shower with epoxy, the last steps are key. They ensure the repair looks seamless. The right finishing techniques make the fixed area blend with the rest of the surface.
Sanding is essential for a professional finish. I suggest using wet/dry sandpaper to smooth the area. Start with a coarse grit and move to finer ones for the smoothest finish.
- Begin with 80-grit sandpaper to level the initial repair
- Move to 120-grit to smooth out rough spots
- Finish with 220-grit for a glass-like smoothness
- Always sand in a circular motion to avoid creating visible lines
When fixing a crack, aim for invisibility. Use water while sanding to avoid heat and get a smoother finish. Take your time and check the surface often for evenness.
Inspect the repair under bright light from different angles. This helps spot any small imperfections needing more work. Focus on the edges to ensure they match the original surface.
Patience is vital in this stage. Rushing can leave marks or uneven areas. Take your time for a professional-looking repair that seems like the crack never existed.
Drying Time and Curing Process
Fixing a crack in a fiberglass bathtub takes time. It’s important to let the repair material dry and harden fully. This step is key to a successful repair.
The curing process is vital for a strong repair. Most epoxy kits suggest specific drying times. This ensures the repair is strong and water-resistant. Here are some important guidelines:
- Allow at least 1 hour for initial hardening
- Wait 24-48 hours for complete curing
- Avoid water exposure during the entire curing period
Optimal Drying Conditions
Temperature and humidity affect the drying process. The best conditions are:
- Room temperature between 70-75°F
- Low humidity (40-50% humidity level)
- Good air circulation without direct drafts
Testing the Repair
After the recommended time, do a coin tap test. Tap the repaired area with a coin. A solid sound means the repair is good. If it sounds hollow, you might need to fix it again.
Don’t rush the drying process. It can weaken your repair. Being patient ensures a long-lasting fix.
Maintaining Your Repaired Fiberglass Surface

After fixing your fiberglass tub or shower pan, it’s key to keep it up. Regular care helps your repair last longer and keeps your bathroom looking great.
To protect your fixed surface, follow these important steps:
- Use non-abrasive cleaning products made for fiberglass surfaces
- Stay away from harsh chemical cleaners that can harm the repair
- Clean the surface weekly with a soft cloth or sponge
- Dry the fiberglass tub after each use to stop water stains
Your shower pan needs extra care to stay in good shape. Check the repair area every month for new cracks or wear. Small cracks can grow if not fixed, leading to bigger problems.
Managing temperature is also vital for fiberglass tub care. Avoid sudden temperature changes, which can stress the material. Start with lukewarm water and then adjust to your preferred temperature.
Using protective measures can help your repair last longer. Use bath mats with soft backing to reduce impact. Also, avoid dropping heavy things in the tub or shower pan. These steps can stop new cracks and keep the surface smooth.
By following these maintenance tips, you’ll keep your fiberglass surface in great shape for years.
Prevention Tips for Future Damage
To keep your fiberglass bathtub and shower crack-free, you need to take care of them. I’ll share some important tips to help you avoid damage and make your tub last longer.
Keeping your fiberglass bathtub and shower in good shape is key. Most cracks come from not taking care of them properly. Here are some tips to keep your surface looking new:
- Use a non-slip mat to reduce direct impact and stress on the fiberglass surface
- Avoid dropping heavy objects directly into the tub
- Clean with non-abrasive, gentle cleaning solutions
- Dry the surface after each use to prevent moisture buildup
- Inspect the bathtub regularly for early signs of cracks
When cleaning, use mild cleaners. A mix of lukewarm water and vinegar works well without harming your tub. Harsh chemicals can shorten your bathtub’s life by 30%.
Fiberglass bathtubs are more prone to cracks than other materials. By following these tips, you can save up to 50% on repairs and keep your bathtub looking new.
Prevention is cheaper than fixing problems. With regular care, your fiberglass surface will stay beautiful and you’ll avoid expensive repairs.
Conclusion
I’ve shown you how to fix a crack in fiberglass. Now, you know how to handle this home repair. From finding out why fiberglass gets damaged to picking the right fix, you’re all set.
Fixing fiberglass cracks is more than just making it look good. It’s about keeping your home safe from water damage. By fixing small cracks fast and using the right stuff, you avoid big, expensive repairs later. Use top-notch materials like two-part waterproof epoxy for bathtub fixes.
Keeping your tub in good shape is key to avoiding more cracks. Use soft cleaners, handle your tub with care, and dry it after each use. If a repair is too hard, get a pro. Your home and your peace of mind are important.
With the right tools and techniques, you can fix fiberglass cracks. Your DIY skills are now better, and your bathroom will last longer. You’ve got this!


