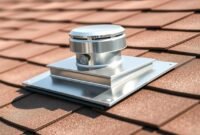
Electrical systems can be tricky, and a bad weatherhead is a big problem. Water getting into electrical wires is dangerous. It can cause short circuits, fires, and a lot of damage.
Most people find it hard to install an electrical weatherhead. This leaves them at risk of electrical dangers.
I’ll show you how to install an electrical weatherhead safely. This will protect your home’s electrical system and avoid big failures. You’ll learn the important parts and how to set it up like a pro.
Understanding Weatherhead Components and Purpose
Weatherheads are vital for protecting your home’s electrical system. They act as a link between your home’s electrical system and the power lines outside. Let’s explore the key parts of weatherheads to see why they’re so important.
A service head, or weatherhead, is more than a simple connection point. It’s a protective barrier against the environment. Its main job is to keep water, debris, and other outside elements out of your electrical conduit.
Read also: How an Anode Rod Protects Water Heater ?
Critical Functions of Weatherheads
Weatherheads have several key roles to keep your electrical system safe and working well:
- Prevent water from getting into electrical connections
- Shield against environmental damage
- Offer a secure spot for service entrance conductors
- Lower the chance of electrical shorts and system failures
Types of Weatherhead Materials
When picking a weatherhead, you’ll find different materials. Metal rigid materials are the top choice for their strength and dependability.
| Material Type | Durability | Best Used For |
|---|---|---|
| Galvanized Steel | High | Standard residential installations |
| Aluminum | Medium | Lightweight applications |
| Stainless Steel | Very High | Coastal or extreme weather regions |
Properly installed weatherheads can cut down electrical system failure risks by up to 70%. It’s vital to check them regularly. Experts suggest annual inspections for safety and efficiency.
While knowing about weatherhead parts is helpful, getting a pro to install them is essential. DIY electrical work can lead to safety issues, with over 30% of projects causing problems. Always hire a licensed electrician for your weatherhead installation.
Read also: How an Anode Rod Protects Water Heater ?
Essential Tools and Materials for Installation
Before starting a weatherhead installation, you need the right tools and materials. This ensures a professional and safe setup. Knowing what equipment to use is key for a successful project.
Here are the essential tools you should gather:
- Wire strippers
- Conduit bender
- Adjustable wrench
- Screwdrivers (flathead and Phillips)
- Tape measure
- Level
- Hacksaw or pipe cutter
For materials, choose high-quality PVC plastic conduit. It’s durable and protects electrical conductors well. PVC is also lightweight, resistant to corrosion, and insulates better than metal.
Make sure to have these materials:
- Weather head
- 200 Amp meter base
- Watertight top connector
- Bottom connector/bushing
- 2-inch Schedule 40 PVC conduit
- Ground rod and clamp
- Service cable (#4/0 Aluminum or 2/0 Copper)
Using top-notch tools and materials ensures a safe and efficient installation. This guarantees long-lasting protection for your electrical service.
Safety Precautions and Code Requirements
Installing an electrical weatherhead needs careful attention to safety and codes. It’s important to know the national and local electrical rules well. This ensures the job is done right and safely.
When you start installing a weatherhead, knowing the safety rules is key. These rules are there to keep you safe and the property safe too.
National Electrical Code Guidelines
The National Electrical Code (NEC) has detailed rules for installing weatherheads. Some important points include:
- Keeping a 10-foot clearance above ground at attachment points
- Service entrance conductors should be at least 18 inches above roof lines
- Using a #8 AWG copper ground wire for proper grounding
Read also: Comparisons of Aluminum Vs Copper Wire
Local Building Authority Regulations
Local rules often add to the national standards for weatherhead installation. These might include:
- Need for specific permits
- Inspection steps
- Rules for the local environment
Personal Protection Equipment
Wearing the right safety gear is vital for safe weatherhead installation. You should have:
| Protection Type | Specific Equipment |
|---|---|
| Head Protection | Hard hat |
| Eye Protection | Safety glasses |
| Hand Protection | Electrical-rated insulated gloves |
| Foot Protection | Electrical hazard-rated boots |
Electricians know that following the weatherhead installation code is a must. Always put safety first and get help from local experts if you’re unsure about the rules.
Preparing Your Home for Electrical Weatherhead Installation
Before starting an electrical weatherhead installation, I suggest a detailed home check. This ensures a smooth process. Your local building authority utility needs specific preparations for a safe and compliant setup.

- Verify local building codes and permit requirements
- Assess your current electrical service capacity
- Determine the optimal location for weatherhead placement
- Inspect existing electrical infrastructure
- Gather necessary tools and materials
When preparing for installation, consider these critical factors:
| Preparation Aspect | Important Considerations |
|---|---|
| Service Capacity | Most homes require a 200-amp service for adequate power needs |
| Meter Base Location | Must be within 36 inches of house corner nearest transformer |
| Mounting Height | Meter center should be 60 inches above finished grade |
I recommend talking to a professional electrician for your specific needs. They can guide you through local regulations and ensure a safe, compliant installation.
Remember, proper preparation is key for a successful installation. Planning and assessing your home’s electrical needs will save you time and avoid complications.
Service Mast Installation Guidelines
Installing a service mast is a key part of your weatherhead setup. It needs precision and attention to detail. This ensures a safe and reliable electrical connection for your home.
Setting up your service mast involves important steps. I’ll guide you through these to create a strong and code-compliant electrical entry point. Knowing these requirements helps protect your home’s electrical system from the environment.
Proper Mast Height and Positioning
The service mast’s height is critical for safety and function. Here are the key clearance guidelines:
- Minimum overhead service conductor clearance: 12 feet above final grade
- Clearance near swimming pools: 22.5 feet horizontal and vertical distance
- Voltage-based clearance requirements:
- Up to 150 volts: 10 feet from grade
- Up to 300 volts: 12 feet from grade
- Over 300 volts: 15 feet from grade
Securing the Mast to Structure
Proper attachment is key for weatherhead installation. Electrical service masts over three feet tall usually need extra support:
| Mast Height | Support Requirements |
|---|---|
| 3 feet or less | Standard mounting |
| Over 36 inches | Brace or guy wire support at 45-degree angle |
Weather Sealing Techniques
Creating a good drip loop and weatherproofing are vital. Use UV-resistant sealants and ensure roof flashing to stop water intrusion. The mast should be 18″ to 36″ from the roof, with care to avoid moisture.
By following these steps, you’ll have a secure and reliable electrical service entry. It will meet professional standards and protect your home’s electrical system.
Installing Service Entrance Conductors
Installing service entrance conductors is a key step in linking your home’s electrical system to the power grid. I’ll show you how to set up these important electrical connections correctly.
Article 230 of the National Electrical Code (NEC) outlines specific rules for these conductors. Homeowners need to know these to ensure safety and reliability. The authority utility company has strict guidelines for these installations.
- Minimum conductor extension from weatherhead: 3′-0″
- Minimum conductor size: 8 AWG copper or 6 AWG aluminum
- Must maintain proper clearances from windows and roof edges
Here are the main steps for installing entrance conductors:
- Measure and cut conductors precisely
- Strip wire ends carefully
- Feed conductors through the weatherhead
- Ensure adequate slack for utility connections
| Service Rating | Phase Conductor | Neutral Conductor | Ground Wire |
|---|---|---|---|
| 100A | #2 CU | #4 CU | #6 CU |
| 200A | 3/0 CU | 2/0 CU | #4 CU |
| 320A | 350 CU | 250 CU | #2 CU |
Always put safety first and seek a professional electrician if you’re unsure. Proper installation of service entrance conductors is vital for a safe and reliable electrical connection.
Weatherhead Mounting and Alignment
Installing a weatherhead requires precision to protect your home’s electrical system. Contractors stress the need for correct positioning and secure mounting. Let’s go over the essential steps for a reliable electrical service entrance.
- Position the weatherhead to maximize water runoff
- Ensure a minimum mounting height of 10-12 feet above ground level
- Select a weatherhead matching the conduit material
- Use appropriate strapping as required by National Electrical Code (NEC)
Securing the Weatherhead Effectively
Watching weatherhead installation videos can help you understand the mounting process. The main steps are:
- Align the weatherhead perpendicular to the service mast
- Use corrosion-resistant mounting hardware
- Ensure tight connections to prevent water infiltration
- Verify the weatherhead can withstand local wind conditions
While DIY fans might try this, hiring professionals is wise. They know the local building codes and utility requirements. Proper mounting stops water damage and keeps your electrical system working well for years.
Creating Proper Drip Loops

As an electrical professional, I know how vital drip loops are in weatherhead installation. A drip loop is a key protective feature. It stops water from flowing straight into your electrical system.
The National Electrical Code (NEC) requires drip loops in service entrance conductors. These loops protect your electrical gear from water harm. They create a drainage point before water can reach important electrical parts.
- Minimum drip loop height: 12 feet above ground
- Purpose: Redirect water away from electrical connections
- Essential for preventing moisture-related electrical damage
When setting up drip loops, I suggest these tips:
- Make sure the loop is at least 24-36 inches from the service head
- Design a downward curve for water to drip off
- Keep enough slack in the conductor for a good loop
Different areas might need special drip loop designs. Always check with your local utility company. They might have specific designs based on local wind and environmental conditions. A well-made drip loop can greatly improve your electrical service entrance’s safety and life.
Remember, installing drip loops correctly is not just a suggestion. It’s a vital safety step. It keeps your home’s electrical system safe from water damage.
Connecting to Utility Power Lines
Setting up your weatherhead needs careful planning with your local utility company. I’ll guide you through the steps to link your electrical service to the main grid. This involves key safety and compliance measures.
- Two hot lines (carrying 120 volts each)
- One neutral line
- Connections at standard height requirements
Service Drop Connection Methods
There are two main ways to connect to power lines:
- Overhead service drop
- Connects via mast knob at roof top
- Requires minimum 12-foot clearance from ground
- Underground service lateral
- Connects through pad transformer
- More expensive installation
Utility Company Requirements
The cost of your weatherhead installation can change based on utility company rules. Most electric providers need a professional check and final connection. They usually handle:
- Meter installation
- Final power line connection
- Compliance verification
Working with professionals ensures your electrical service is safe and meets local codes. Always check with your utility provider for exact connection details and any costs.
Conclusion
I’ve shown you how to install an electrical weatherhead, from start to finish. We covered the key parts and how to mount and connect them. Installing a weatherhead needs safety, accurate measurements, and following the National Electric Code (NEC) rules.
This guide highlights the need for the right placement, materials, and installation steps. Weatherheads vary in size and material, like aluminum and galvanized steel. They have specific height, weight, and position needs. Knowing these details is key for your electrical system’s safety and performance, no matter the setup.
While this guide offers a lot of info on installing electrical weatherheads, remember the risks. If you’re unsure about any part, it’s wise to get a licensed electrician’s help. They make sure your installation is safe, meets local codes, and works well for years.
Installing a weatherhead is not just a task. It’s a vital step to protect your home’s electrical system. Take your time, follow the guide closely, and always put safety first.


