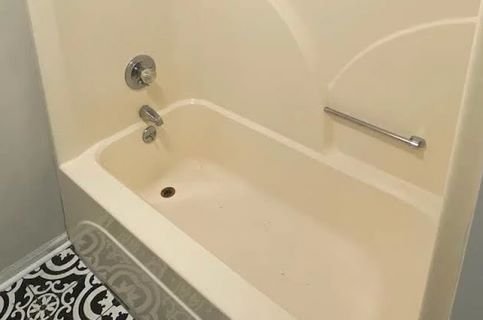
A bathtub may become one of your go-to spots to unwind after a hectic day. But as time advances, your bathtub may face difficulties as well: a big bump with some objects, getting cleaned with harsh materials, used too frequently, or isn’t supported properly.
If your bathtub is made from fiberglass, all of these may result in cracks, either hairline-sized or even bigger. This article will show you how to fix a hairline crack in fiberglass tub. Please note that this will only be suitable for hairline crack in fiberglass tub.
DIY Project for Fixing Fiberglass Tub’s Hairline Crack
Before knowing how fiberglass shower crack repair is conducted, you will need to better look at your bathtub. Is it truly a hairline crack, or is it bigger? Plus, try to find more and follow how far the crack has been formed.

If you find that the crack has been far bigger and involves a wider area (even until reaching the bottom of your tub), this method of fixing a hairline crack in a fiberglass tub will not work for you. Call a professional to deal with this type of crack, which may cost you more than going DIY.
For this DIY fiberglass hairline crack repair, you will need a fiberglass repair kit. You can easily find the kit in your local hardware stores or even online. Aside from the kit, you may need several additional items:
- Household cleaner and sponge
- Paintbrush
- Scissors
- Fine-grit sandpaper
Procedure:
- Open your windows and door to avail better air circulation. Remember, you’re going to work with chemicals. Additionally, prepare to work with gloves and other safety equipment.
- Clean the area surrounding the crack using household cleaner and sponge. Rinse it thoroughly and dry with a cloth afterward.
- Slowly sand the cracked area. Then, using a soft brush, clean off the dust to help the adhesive sticks better later.
- Take the adhesive from your purchased repair kit and proceed to apply it. Apply the adhesive just enough and apply using a soft brush evenly.
- Get the filler applied onto the cracks using a putty knife. Make sure all cracked areas are covered with the filler. It will surely leave some excessive filler. With the same putty knife, scrape it off from the tub’s surface.
- Then, sand again the cracked surface with sandpaper you’ve prepared earlier. This second sanding is required to remove any excess material from the additional patch/filler. Then, dismiss the dust from the applied area.
- Prepare the epoxy gel according to the instructions shown in the kit. Once ready, apply the gel with a paintbrush. Note that the gel must cover the whole, cracked area plus an additional inch.
- Now before the gel dries up, prepare a fiberglass cloth to cover the crack. Ensure that no bubbles are found under the cloth. Use a putty knife to eliminate the bubbles and avoid the cloth from accidental folds; hence the result is flush.
- As the last step, apply one coat of sealer and buffing compound and wait for it to dry thoroughly.
So that’s how to fix hairline crack in a fiberglass tub that you can do yourself. It sounds pretty easy. The important thing is to make sure the crack is truly a small one. Otherwise, it may crack again even after you do all of those steps.


